Assigning group access to users
Intuitive Dashboards has a publishing and security system based on 'user-group membership'. When a user is created, they can be assigned group memberships which gives them access to the different 'entities' that have been published to those groups including components, dashboards etc.
The security filter system, which limits the data that can be seen by a user when they login, may also be linked to the group membership i.e. Members of this group can only see this data...
You will need to have full Administrator or Users Administrator (V5.3.2 onwards) privileges to maintain users and group memberships.
To assign group access to a user:
Applies to v.5.1 onward.
1 Go to Menu>Admin>Users
Applies to v.5.1 onward.
1 Go to Menu>Admin>Users
2 Select the desired user
3 Click on the 'Edit' icon to start editing the entity.
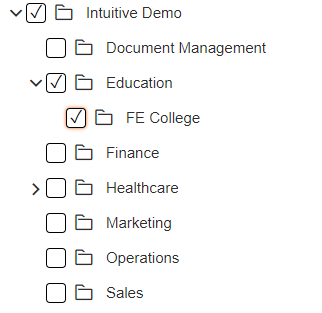
4 Once you have selected the appropriate user for editing, you can use the group tree view on the right to select the groups you wish that user to have access to.

When selecting sub-groups, please note that users will automatically have access to parent groups going back to the beginning of the tree.
5 Once done, ensure to Save your changes. To stop editing, select the Cancel
  icon.
icon.
3 Click on the 'Edit'
4 Once you have selected the appropriate user for editing, you can use the group tree view on the right to select the groups you wish that user to have access to.

When selecting sub-groups, please note that users will automatically have access to parent groups going back to the beginning of the tree.
5 Once done, ensure to Save