Defining Security Identifiers - V5.2 and earlier
Security Identifiers are customisable user and group attributes that can be specified by the administrator to match an exact value in a dataset, if no other attribute applies. They are limited to one per user or group.
They work by retrieving rows from a security filtered dataset where the filtered column value exactly matches the user/group attribute value (example below). This would mean that each user would see individually filtered data specific to them OR according to the group security settings - specific value or the group name itself.
Note: For Security Identifiers to work properly, a security filter (either on group or user level) has to be applied to the dataset first!
Defining a security identifier:
Applies to v.5.1 onwards.
1 Navigate to Admin>Users or Admin>Groups.
2 Select the required user or group.
3 Click on the 'Edit' icon to start editing the entity.
4 If you are editing a user, check the 'Apply Security Filters' to enable the field.

If known, you can enter the exact attribute value directly in the security identifier text box.
 - e.g., this user will have the Security Identifier set to their name, Eric Evans. Beforehand, in the relevant dataset(s), the security filter was set to:

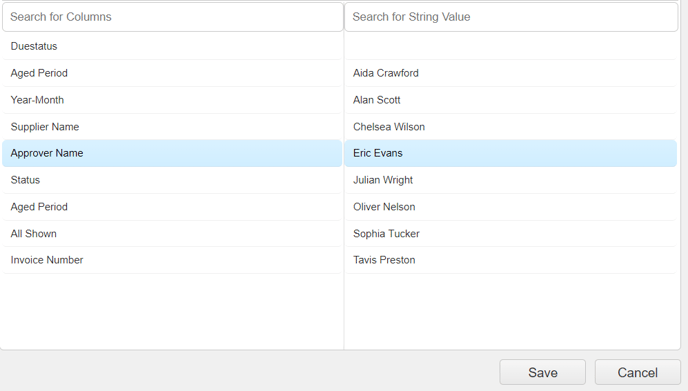
4 If you are unsure of the exact security identifier value, you can select the browse icon to navigate to the dataset containing the column/value of interest.
They work by retrieving rows from a security filtered dataset where the filtered column value exactly matches the user/group attribute value (example below). This would mean that each user would see individually filtered data specific to them OR according to the group security settings - specific value or the group name itself.
Note: For Security Identifiers to work properly, a security filter (either on group or user level) has to be applied to the dataset first!
Defining a security identifier:
Applies to v.5.1 onwards.
1 Navigate to Admin>Users or Admin>Groups.
2 Select the required user or group.
3 Click on the 'Edit'
4 If you are editing a user, check the 'Apply Security Filters' to enable the field.

If known, you can enter the exact attribute value directly in the security identifier text box.
 - e.g., this user will have the Security Identifier set to their name, Eric Evans. Beforehand, in the relevant dataset(s), the security filter was set to:
4 If you are unsure of the exact security identifier value, you can select the browse
5 From the tree view select the required dataset.
6 Select the security filtered column.

7 Select the specific column value you wish to assign to the user or group.
8 Save your selection to close the dialogue box.
9 Save the changes to the user or group by selecting the Save icon on the toolbar