Creating a filter component
Available V6.0 onwards
Filter components (new V6.0) allow dashboard filters to be applied to a dashboard simply and easily. Once a filter component has been created it can be placed onto a dashboard just like any other component and will apply a filter to the dashboard for the items ticked when the Apply Filter icon ![]() is clicked. Filters can be reset using the
is clicked. Filters can be reset using the ![]() icon.
icon.
a filter component can filter one or more columns from the same dataset and multiple components can be placed on the same dashboard.
Example: Show colour copy in the last three months for Odin Technologies Ltd.

Creating a filter component:
- Choose Main Menu -> Component Builder -> New Component.
- Select the dataset you wish to create the component from.
- Select the 'Filter Component' Icon from the component types available:

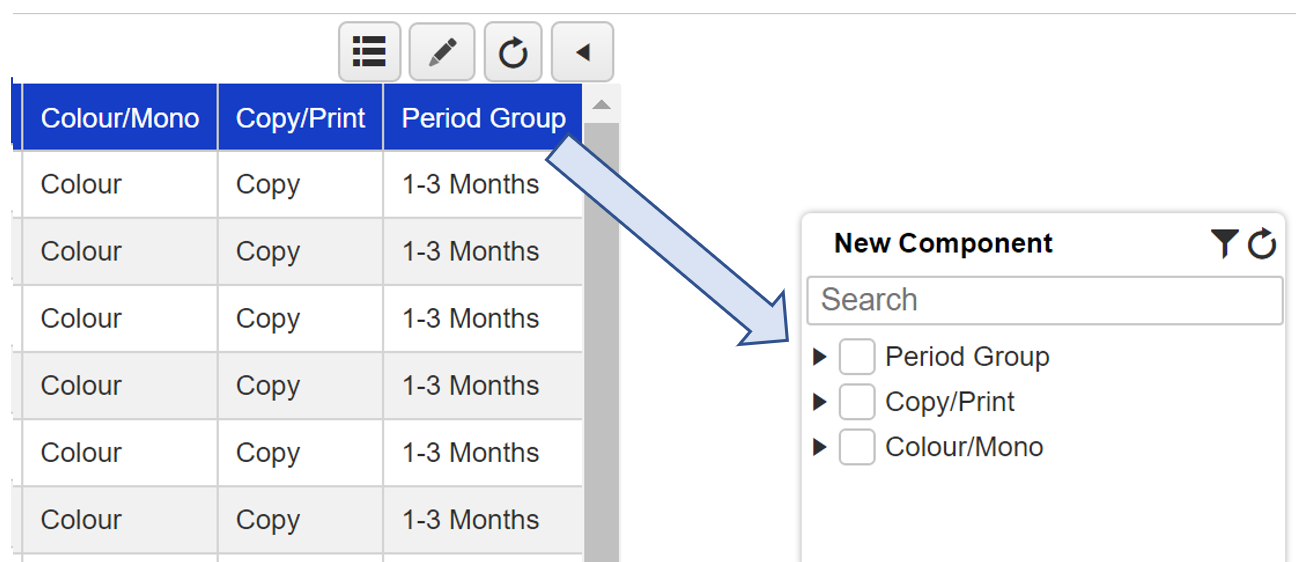
- Drag and drop the column(s) you wish to filter from the dataset.

- The content of each filter category can be pre-filtered using the standard component filter functionality provided.
- Enter the component title and save the component in the usual way using the save icon

- The new filter component can now be added to a dashboard in the normal manner.
Design Tip: In the example above, we place three columns from the same dataset onto a single filter component. It would also possible to create three individual filter components (one for each column) which will function independently of each other on a dashboard.
See also: 'How to filter a dashboard using filter components' which describes the operation of filter components on a dashboard.