This section describes the process of creating a Master-Detail dashboard. In most respects the creation process is the same as that for any dashboard as described in creating a dashboard.
In a Master-Detail dashboard, the Master component provides a means for the user to select an attribute which is used to filter the other components (the detail components) on the dashboard.
As standard, only detail components based on the same dataset as the master component will be filtered, unless a linked filter exists between the different datasets.
Master-Detail dashboards are in very common usage and typically found as often as standard dashboards.
Creating a Master-Detail dashboard:
- From the main menu select Dashboard Builder -> New Dashboard
- Select the type of dashboard you wish to create:

- select the components to be included on a dashboard and nominating one as the master component.

- Now nominate a Master Component. Master components can also be changed at design time by pressing the Dashboard Component Settings
 Icon:
Icon: 
The components can also be aligned here using the X and Y Coordinates and resized using the Width and Height.
Viewing a Master-Detail Dashboard
A master component can be identified by the [Master] text next to the component title.Example:
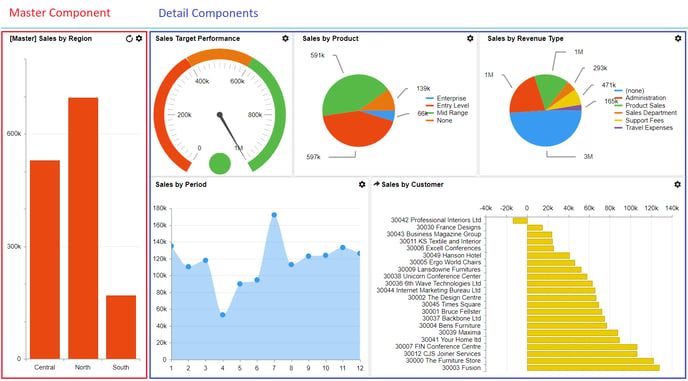
When a value in the master component is selected, each detail component will display a loading message before refreshing with the appropriate filter applied. An example would be of each component being filtered for the year 2008.
In the above screenshot, taken from the Intuitive demo 'Sales Performance Analysis', the Red area is the Master Component and the Blue the detail components.